What is a side light?
I had no idea, but found out those windows located on the side(s) of your door, are called side lights – Who knew?
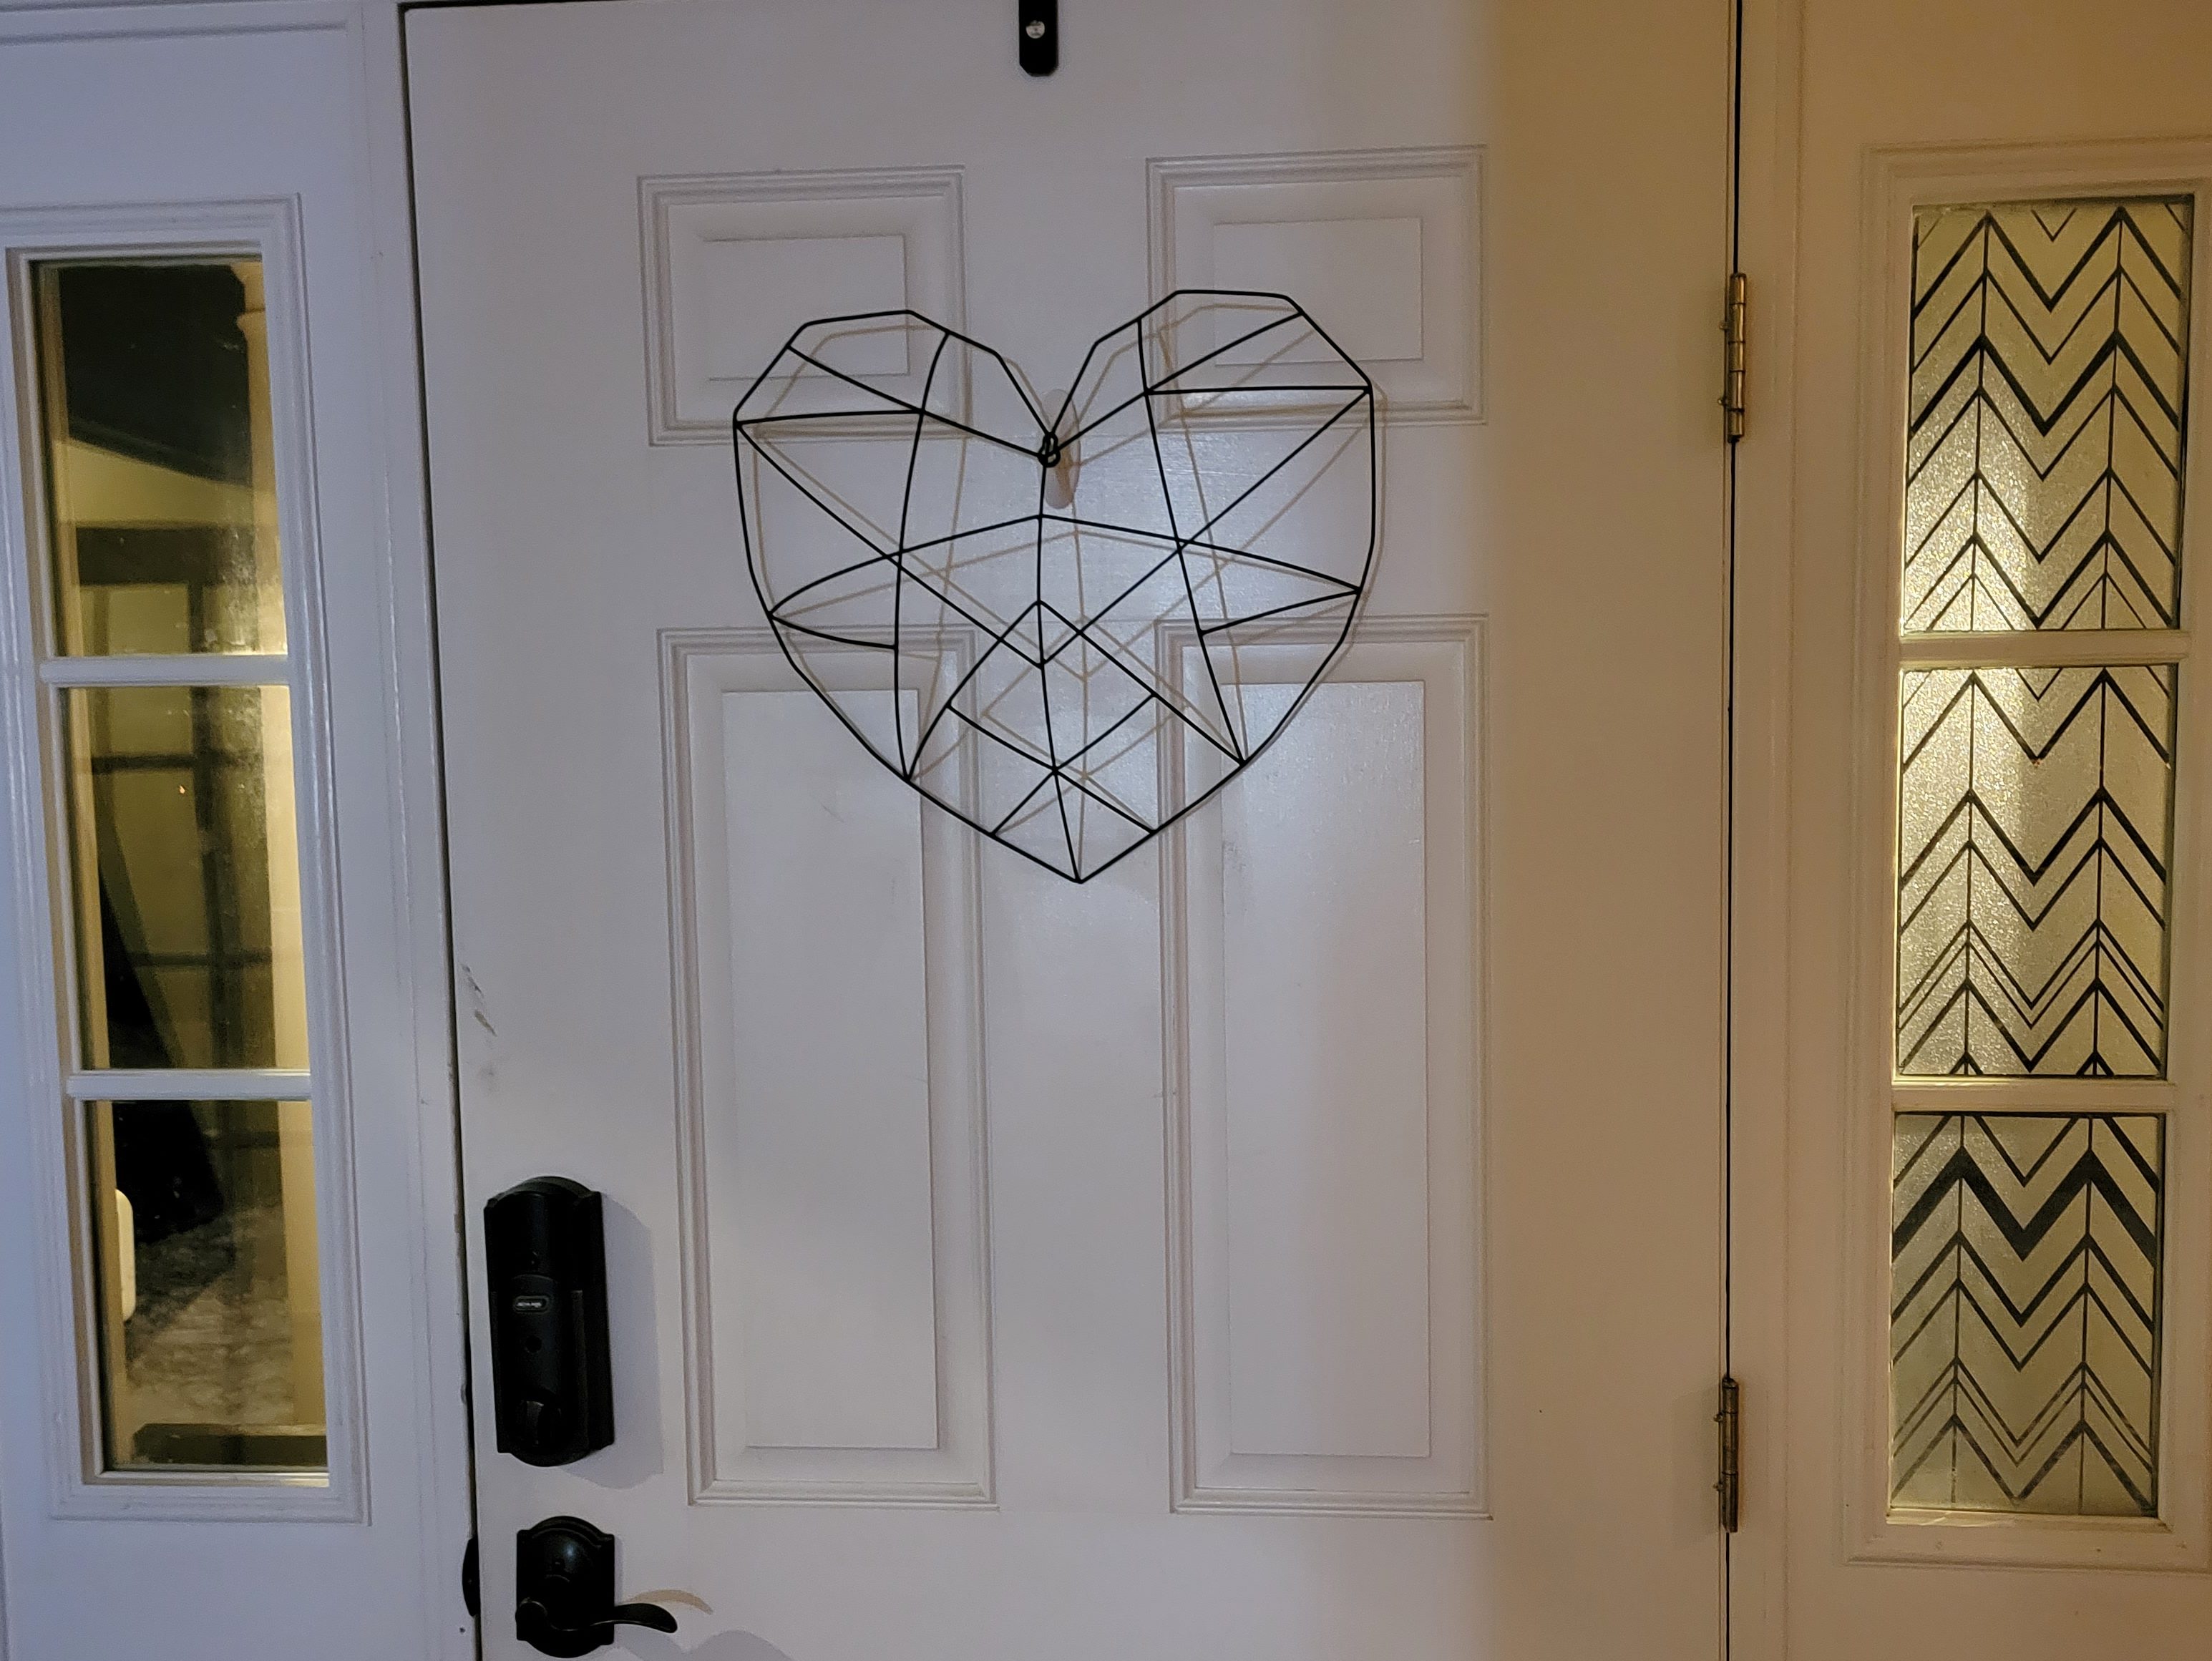
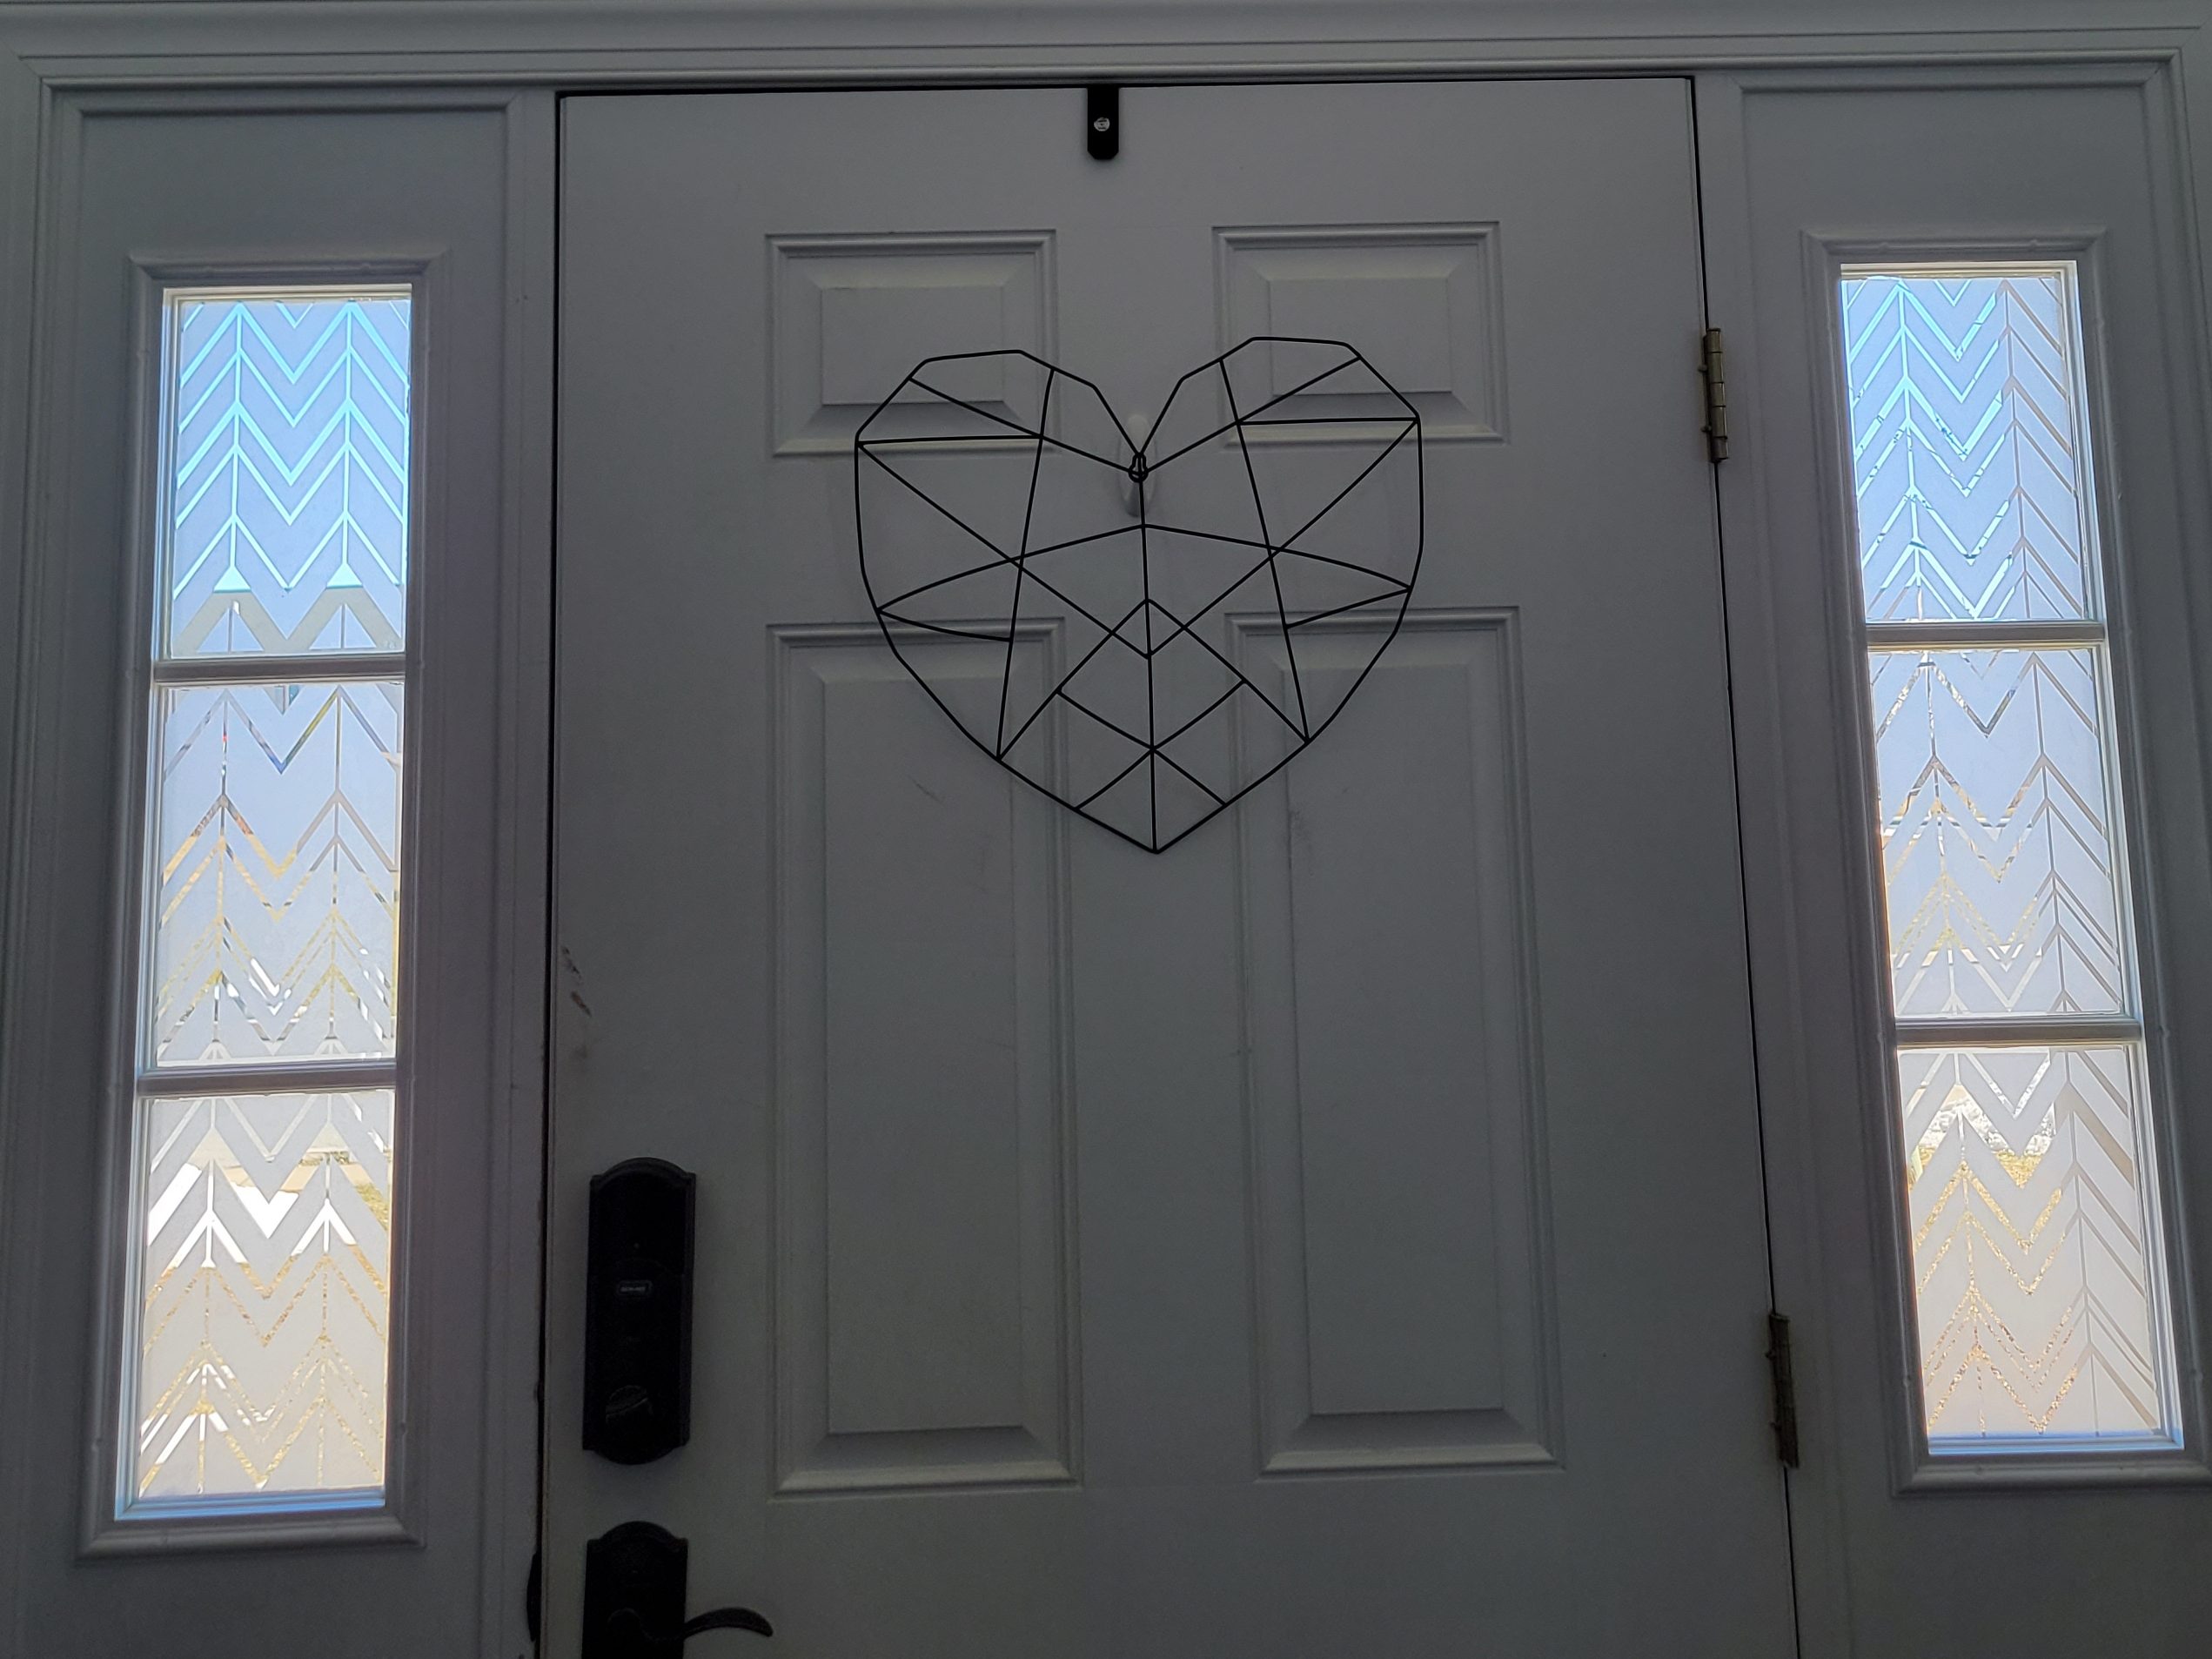
Since I moved into my house 7 years ago, I have wanted to make my front door side lights more private. I felt like everyone could see into my house as I walked down the stairs with bed head or walked across the hallway in the middle of the night to check on my son. I know my life is just not that exciting, and no one was actually spying on us through our side lights, but they made me feel vulnerable and exposed! I loved the light coming in though, So I knew I had to find a way to keep it.
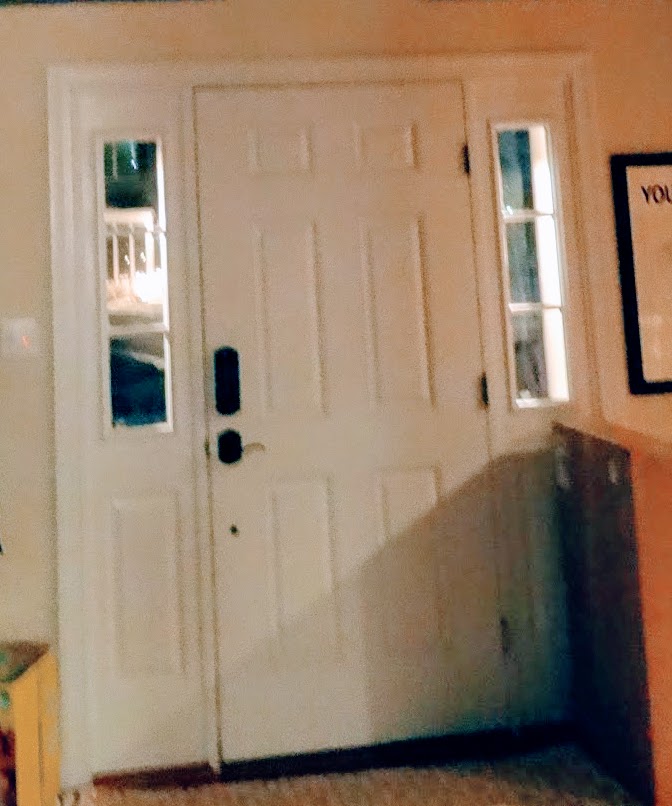
Before Picture
I forgot to take a before picture, so I had to dig through old photos to find this one. It is blurry, but you can see how open it was with the clear glass.
I started looking into ways to make it more private. They sell small curtains and blinds, but they really didn’t fit my style, or budget, and they blocked the light coming in. Then I stumbled across this frosted vinyl that could be used in my silhouette cutting machine. I bought it with the intention of creating a pattern, cutting it, and placing it on the windows. Fast forward two years to 2021, and I am finally ready to dive in!
TIP!! If you do not have a cutting machine, I did find other, already patterned styles, online that you can use. Click here for am example!
I searched the web for patterns and found one that caught my eye, then I made it my own and created it within silhouette studios. For those of you who have one, I just created a rectangle the size of each panel and used the straight line tool to create the lines. Here is what it looked like in the studio.
It is important to make sure there are an even number of lines to create the look. Think about what part will be ‘weeded’ out and therefore be negative space that will be the clear window, and what part will remain and be frosted glass.
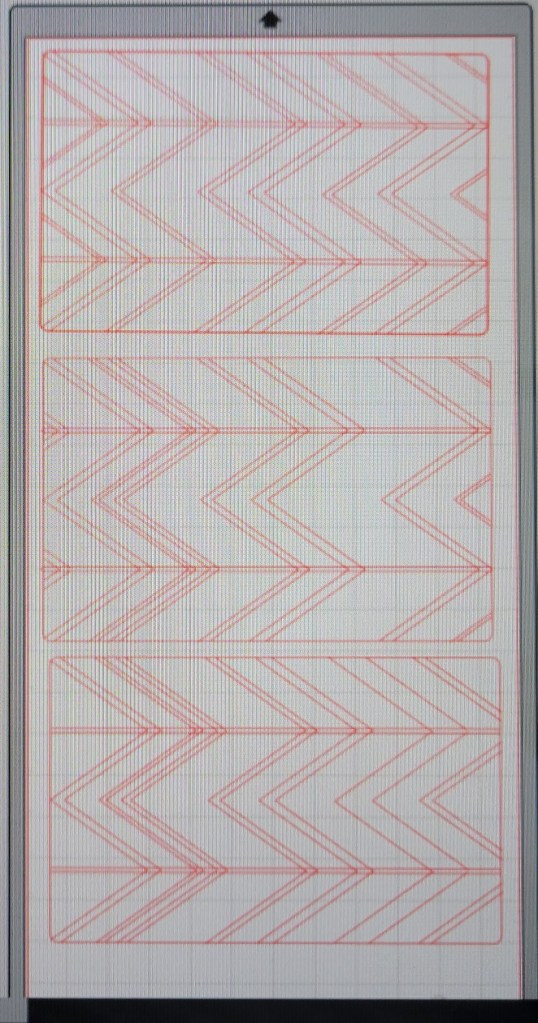
I designed one of the window panes, and then decided that I wanted them to vary for each window, and also connect to each other. In order to do this, I copied the design and lined 3 of them up. I then moved the ‘M’ shaped lines slightly to match the one above and below and varied the middle. I then rotated the three different panes sideways to get as many cut from one piece of vinyl as I could.
The picture to the left shows the print position of the three panels.
After a quick cut and some weeding, it was time to put it on the windows. Because what I cut was not a solid piece, the best way to line every thing up is to use transfer tape. I cut the 12 x 24 inch strip you see above, into 12 x 8 strips so each panel was separate. I then placed transfer tape on top of the design on one of the 12 x 8 strips. I can then lift off the design from the backing as one whole piece. From here, all I have to do is place it on the window pane, squeegee it on, and remove the transfer tape. Just my luck, I live in the North East and it is winter time. The vinyl is not sticking to the window! I did a quick internet search and confirmed my idea should work, so I pulled out a hair dryer and began to heat up my windows. I also heated the ‘sticky’ part of the vinyl right before applying. It worked well, though a few pieces didn’t want to initially stick, they did once I pressed them down.